In this post, we will guide you through the steps to enable Windows Sonic in both Windows 10 and Windows 11. But first, we must know what Windows Sonic is and what it gives us.
Windows Sonic is a spatial sound solution in Windows 10 and Windows 11 that can enhance your movie or gaming experience. It provides a more immersive experience by adding spatial sound and enhancing the audio quality of your headphones.
To turn on Windows Sonic in Windows 10, follow these steps:
1. Open the *Windows Settings* menu by right-clicking the *Start* menu and selecting the *Settings* option.
2. In the *Windows Settings* menu, select *System > Sound*.
3. In the *Sound* menu, select your output device from the drop-down menu, then select the *Device Properties* option underneath.
4. In the new window that opens, select *Spatial sound*.
5. In *Spatial sound format*, select *Windows Sonic for Headphones*, then select **Apply**¹.
That’s it! You can now enjoy a more immersive audio experience with Windows Sonic enabled.

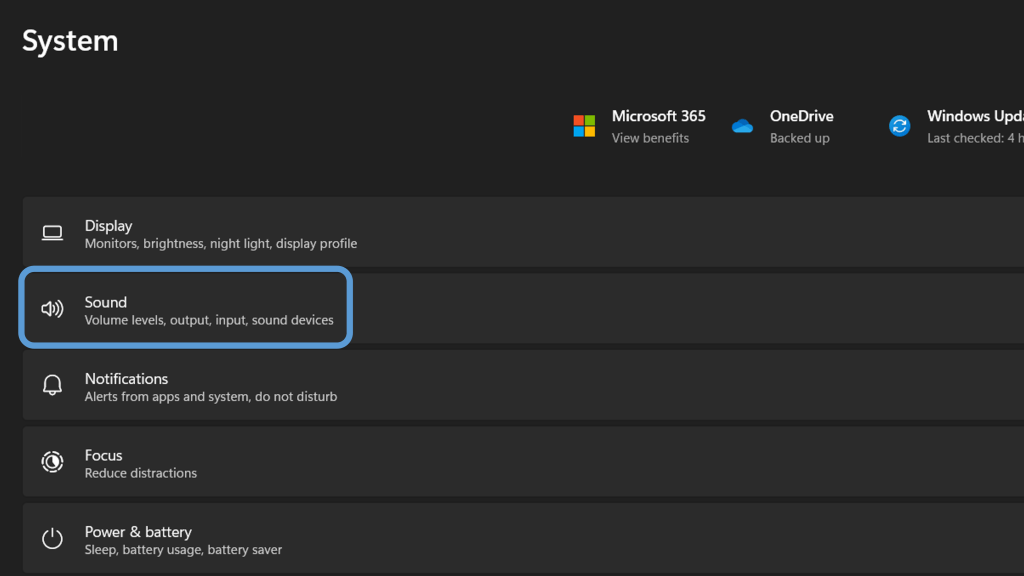
To turn on Windows Sonic in Windows 11, follow these steps:
1. Open the *Settings* Start Menu.

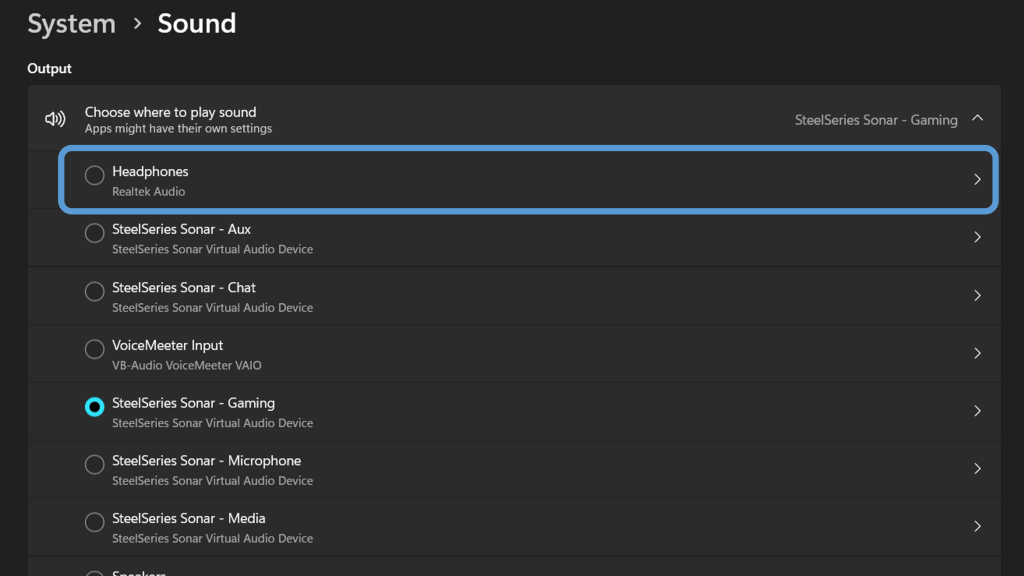
2. Select *Sound > Speaker* (from the Output section).
3. Now, from *Spatial Sound*, change the Type to **Windows Sonic for Headphones**
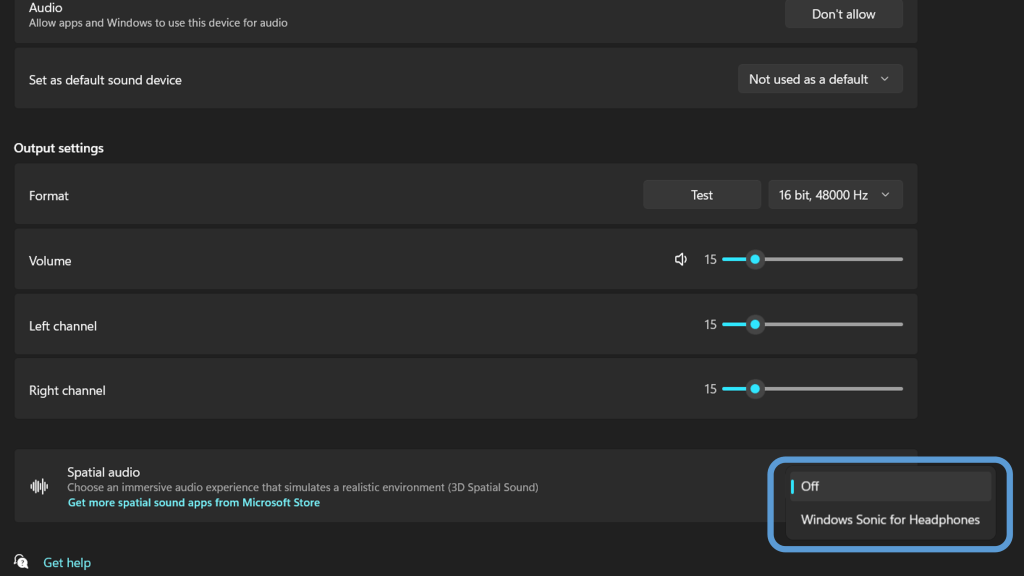
4. Now you can enjoy watching movies and listening to music in a more immersive mode with Windows Sonic enabled.
We hope this guide has helped you turn on Windows Sonic in both Windows 10 and Windows 11. Give it a try and see if you notice a difference in your audio experience!
